")
This is a continuation of a multi-part guide. See Part 1 to get started.
What’s probably the most unique aspect of ChromeOS is its native support for Android apps. Apps aren’t run in a virtualized Android OS image as with other operating systems and SDK environments. This is thanks to Android Runtime for Chrome, also known as ARC.
Debugging with Android Runtime for Chrome
In the last section, we left off with a compiled React Native Android app, but fell short of actually running it. Well, if your ChromeOS device supports Android apps, we can utilize ARC to install and debug that app.
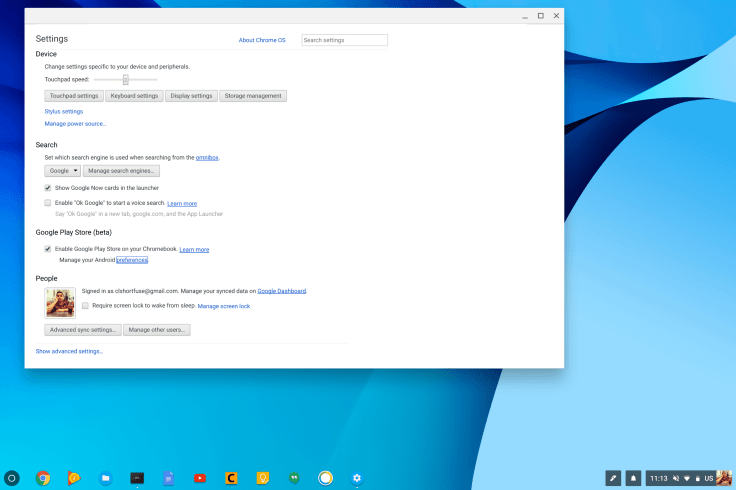
We start by making sure by accessing ChromeOS settings and making Google Play Store is enabled. We want to manage the Android preferences. Note that ChromeOS Settings may look different from the screenshot.
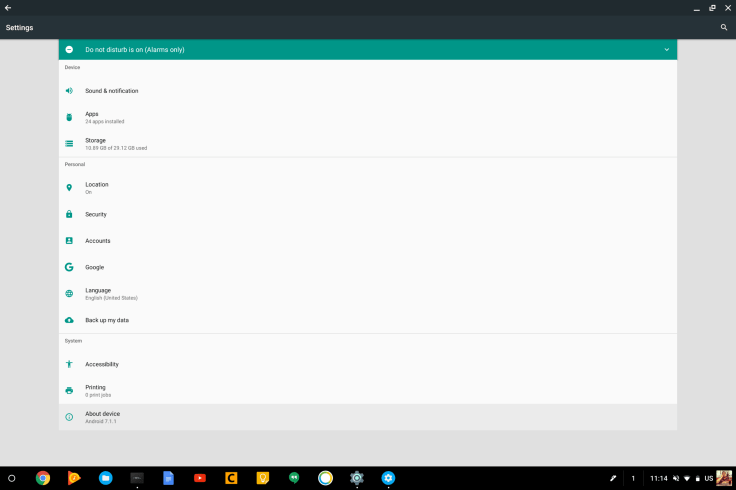
From here we’ll want to access About device to unlock Developer Options.
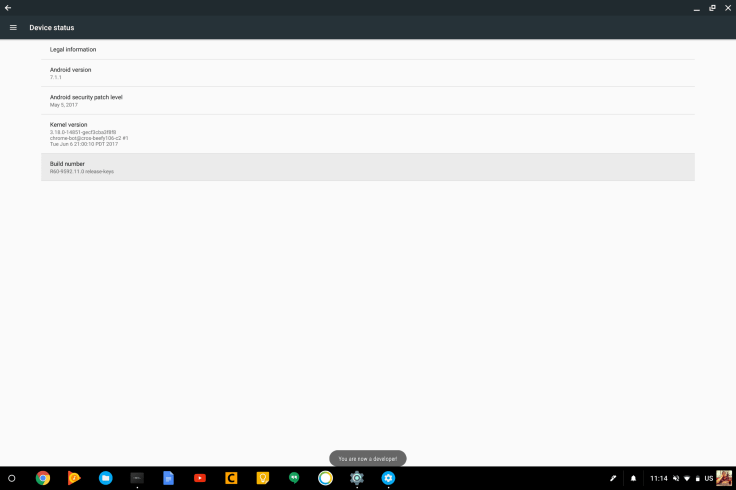
Click Build Number seven (7) times until a toast message appears saying “You are now a developer!”

Return to Android Settings and select Developer options.
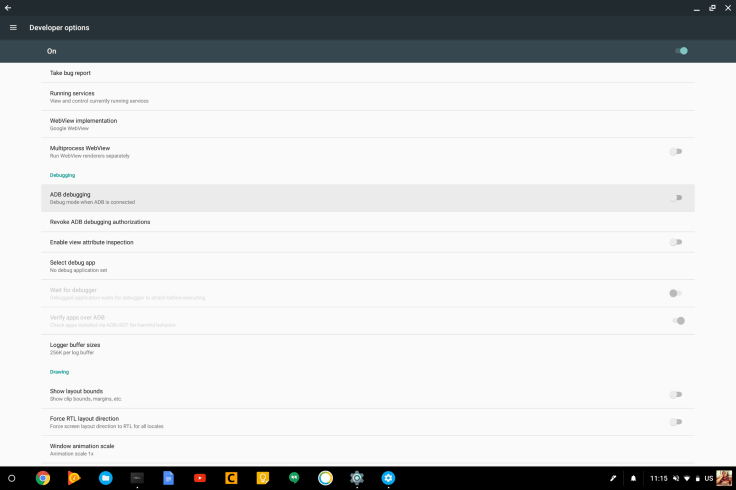
Click to enable ADB debugging.

Click OK to allow ADB debugging.
The next phase will enable allow us to SSH into our ChromeOS. Before we can do that, we need to disable rootfs verification.
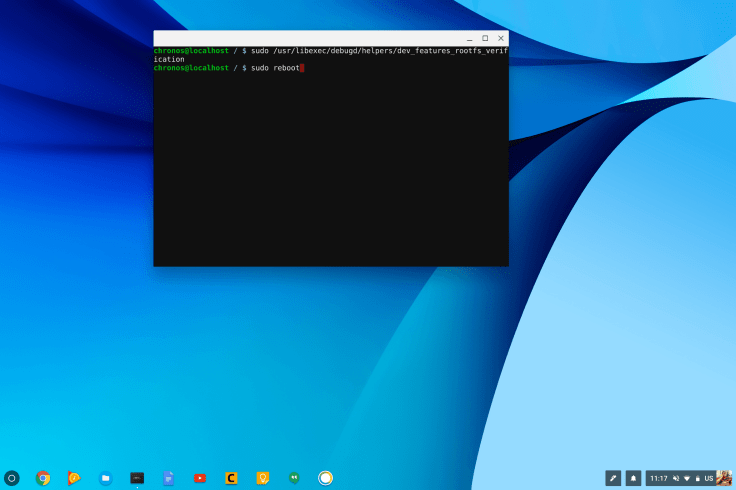
Open up your crosh shell and run sudo /usr/libexec/debugd/helpers/dev_features_rootfs_verification followed by sudo reboot to disable rootfs vertification and reboot your device. (Remember to press Ctrl+D to skip the warning screen.)
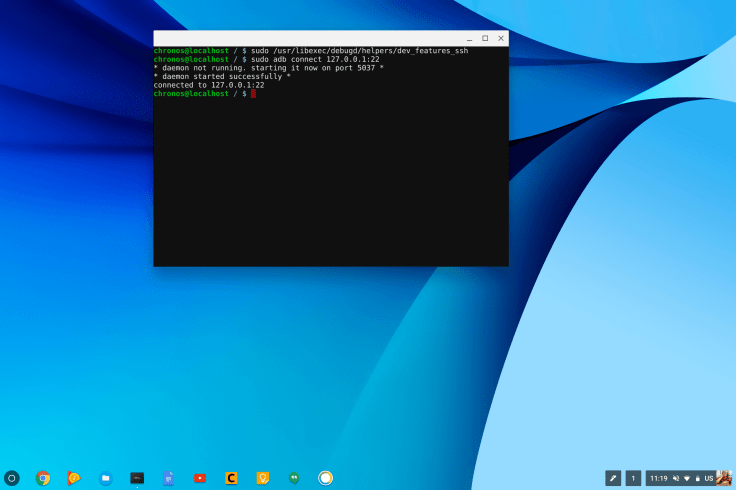
Now that rootfs verification has been disabled, we can enable SSH by performing sudo /usr/libexec/debugd/helpers/dev_features_ssh from shell. The operation will complete silently. At this point we can tell the ChromeOS device to connect to itself (localhost or 127.0.0.1) over the default SSH port (22) with the Android Debug Bridge (ADB) by performing a sudo adb connect 127.0.0.1:22 command.
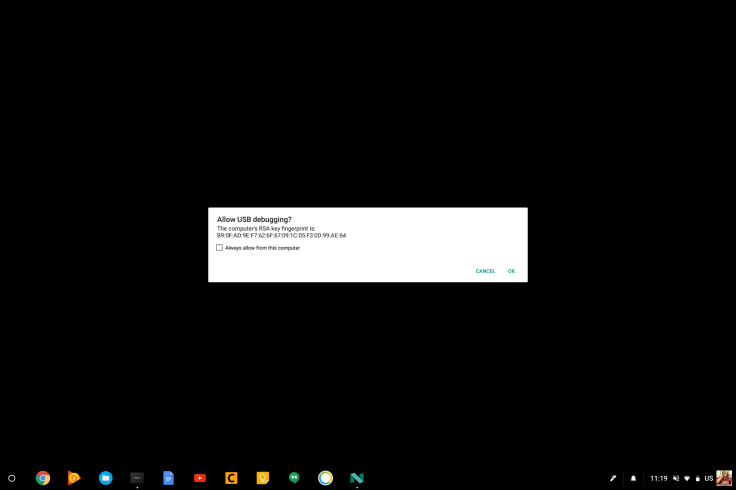
You may get a prompt to allow USB debugging. If you notice the icon, this is a prompt from the Android layer asking for permission to connect with ChromeOS device. You can check the checkbox and select OK.
We are now ready to install and run our React Native Android app.
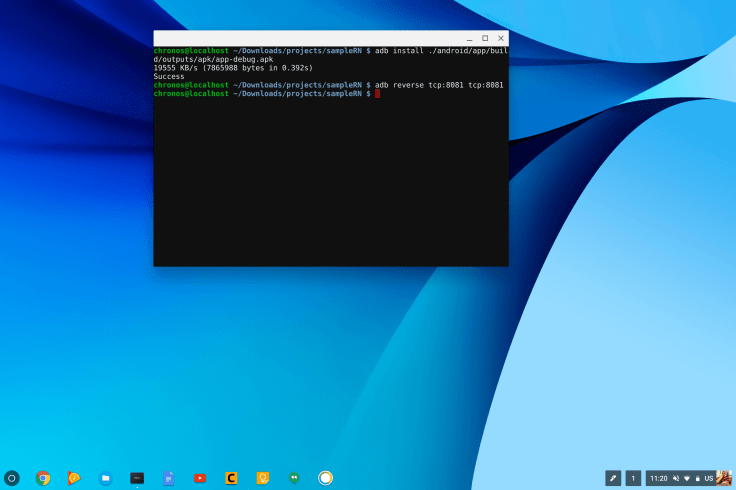
Navigate to your sampleRN project and perform adb install ./android/app/build/outputs/apk/app-debug.apk which will install the app on your ChromeOS device. To allow React Native to communicate with the app, we need to perform adb reverse tcp:8081 tcp:8081 as well.

Finally, perform react-native start to start the packager necessary to send files to the app. Once it’s ready we can start our Android app.

Search for sampleRN in your list of apps (which should have been installed by the adb install command) and open it.
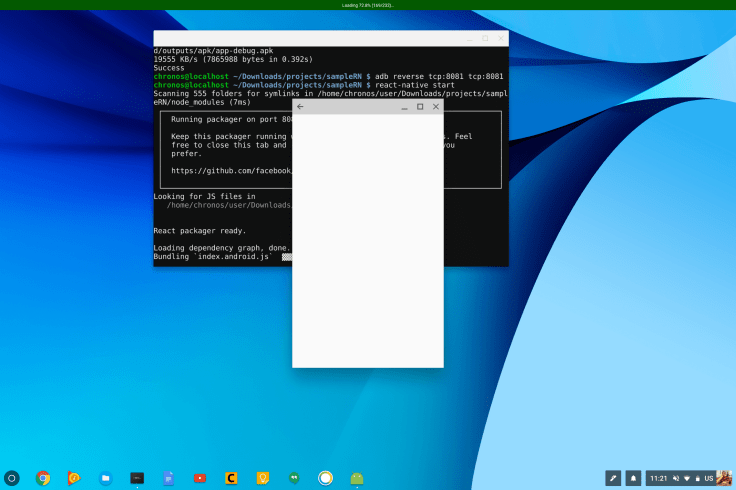
You should see a green progress bar on the top of the screen as well as a progress inside the terminal shell. This means the Android app is remotely loading over React Native’s packager.
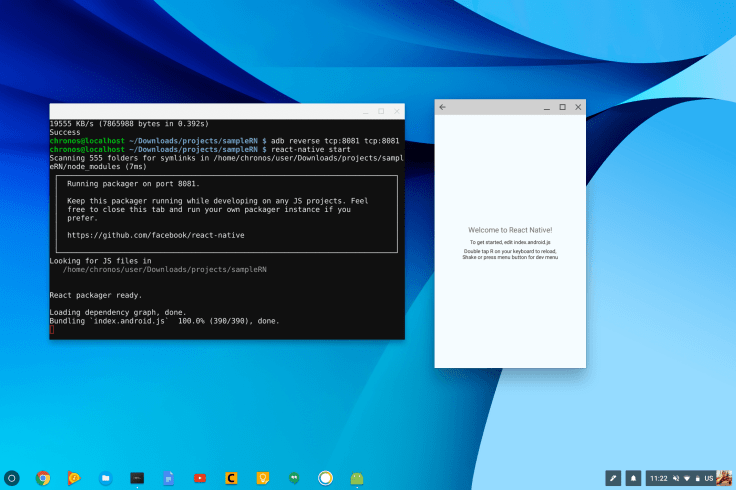
Complete! That’s real Android app running on your ChromeOS being managed by a nodeJS app running over crosh shell.
This really shows how much potential ChromeOS has underneath. If there’s more you’d like to see, let me know in the comments!
Part 2 – Crosh and Nano development environment
Part 3 – Creating and modifying files from shell
Part 4 – Creating a web app with nodeJS and Caret
Part 5 – Android Development with React Native

Leave a comment