")
This is a continuation of a multi-part guide. See Part 1 to get started.
With a crosh, nano, and chromebrew setup, we have, at minimum, all we need to build a variety of apps, be it, HTML5, nodeJS, python, ruby, or C++. For this part on getting used to creating and modifying files while also interfacing with the ChromeOS visually layer. We’re also going to make some modifications to .bashrc, to make development a little smoother.
Setting up shell startup scripts
Let’s fire up our shell by opening Secure Shell, access crosh and typing shell, as we’ve done before. Once open, we’re going to type nano ~/.bashrc to start editing our shell’s startup scripts.
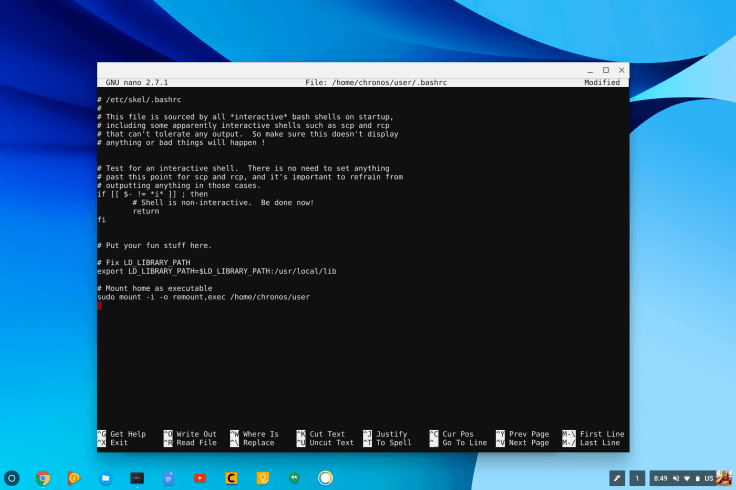
You’ll notice that the ChromeOS has add some comments. Let’s go down to the bottom, after # Put your fun stuff here. Anything with a # prefix is not actually run by the script, so pay attention to what doesn’t have that prefix.
I’ve already added some fun stuff related to LD_LIBRARY_PATH. If you had issues running nano or other applications, I suggest you copy the line I put.
More importantly, I remount my $HOME folder to allow files to execute. While chromebrew runs applications in /usr/local/bin, the space there is rather limited and can easily fill up. To do this, add the line:
sudo mount -i -o remount,exec /home/chronos/user
Now every time your access the shell, you’ll have your home folder remounted to allow unix applications to execute. Press Ctrl+X to exit nano followed by Y and ENTER to save your changes.

In order for out startup script changes to take effect, we’ll have to exit crosh by typing exit, which will kick up back up to crosh.
Creating a projects folder
Now that we can create and modify files, we need to store them in a good place. We are going to use a projects folder inside Downloads.
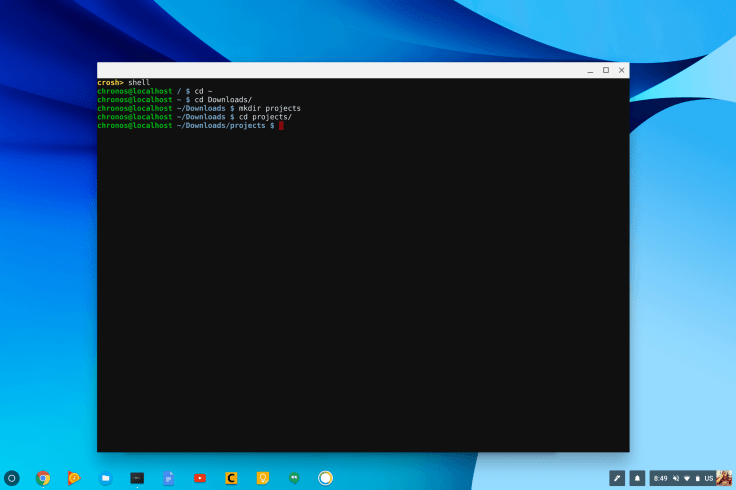
Let’s get back to shell by typing shell and change directory (cd) to our home path (~) by typing cd ~. From here’s we’ll change directory again to Downloads with cd Downloads. Now we’ll make a directory called projects with mkdir projects. Once more, cd projects.

To create an empty file called example.js, type touch example.js. You can open the Files app in ChromeOS and see that the file now exists.
This shows us our shell layer interfaces with the ChromeOS visually layer, namely the Downloads folder. Files you download in the Chrome Browser can be accessed by in shell. In the next part, we’re going to use nodeJS and Caret to build an web app we can access from Chrome Browser.
Part 2 – Crosh and Nano development environment
Part 4 – Creating a web app with nodeJS and Caret
Part 5 – Android Development with React Native
Part 6 – Debugging with Android Runtime for Chrome

Leave a comment