")
This is a continuation of a multi-part guide. See Part 1 to get started.
At this point, we’ve activated developer mode on our ChromeOS device and now want to get start coding. We first need to build a terminal environment that we can use to run any compilers we may want to use.
We’re going to start with Secure Shell, which is a first-party ChromeOS extension we will use to access Crosh. Secure Shell does more than your typical Crosh tab since it gives a dedicated window and allow us to use keyboards commands that won’t work in a crosh Chrome Tab (like Ctrl+W).
Setting up a shell environment
So let’s get started by downloading Secure Shell from the Chrome Web Store.
https://chrome.google.com/webstore/detail/secure-shell/pnhechapfaindjhompbnflcldabbghjo
Once installed, I suggest you pin the app to the taskbar since you’ll likely be interfacing with often.
Fire up Secure Shell and we’re going to add a connection to crosh.
Call the connection anything you want and under user use run and hostname >crosh.

From here we can press ENTER to start up our Crosh shell.

Next we’ll see the crosh welcome screen and a prompt asking for input.
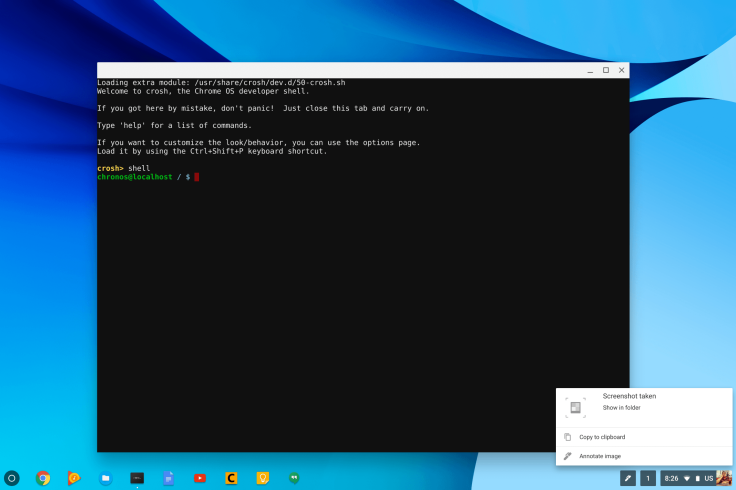
You don’t need Developer Mode to access crosh, but you will for the next command. Enter shell to get access to the ChromeOS shell layer. If this command doesn’t work, it means Developer Mode wasn’t enabled properly.
Once you access the shell, you’ll generally want to work from the the Downloads folder, so what you do here can be seen in the Files app and all other ChromeOS apps and extensions. As in the picture above, I change directory to ~ (which is a shortcut to my user’s home directory) and Downloads.
Now we’re going to install chromebrew which is a repository of applications built and tweaked to work on your ChromeOS device. In this example I’m using jam7‘s fork which, at the time, than the official skycocker. For the purpose of this guide, it’s a matter of preference.
To install Chromebrew, type:
wget -q -O - https://raw.github.com/skycocker/chromebrew/master/install.sh | bash

Once chromebrew is complete, we’re going to install nano, which is a text editor we can use in shell. Later on in the guide we’re going install a GUI based editor called Caret, but to modify files outside of Downloads, we use nano. We will install it with chromebrew by typing:
crew install nano

chromebrew will automatically know which other packages need to be installed, so we will accept the prompt by typing Y.

Once it’s done we’ll see a line saying Nano installed! Congratulations, you’ve installed your first chromebrew package. Hopefully, this will be the first of many.

Now on, you can type nano from shell and start it up. The next part of our guide will deal how to create and modify files from shell.
Note: If you get an error about loading shared libraries when running trying to run nano, perform the following command first:
export LD_LIBRARY_PATH=$LD_LIBRARY_PATH:/usr/local/lib
This issue may be fixed in future versions of chromebrew.
Part 3 – Creating and modifying files from shell
Part 4 – Creating a web app with nodeJS and Caret
Part 5 – Android Development with React Native
Part 6 – Debugging with Android Runtime for Chrome

Hi, I followed the directions above and ended up getting the following when trying to run nano for the first time in Secure Shell:
nano: error while loading shared libraries: libncursesw.so.6: cannot open shared object file: No such file or directory
I tried running the command at the end and restarted the shell session, but no luck. Any ideas?
LikeLike
Look at the note at the end about changing LD_LIBRARY_PATH.
LikeLike
Same problem as @jasonsidea here… Ran the export line but nothing changed.
LikeLike
Ah, I made a mistake. I updated the post to show /user/local/lib instead. I see you caught it, on Reddit. Replying here so @jasonsidea gets the update.
LikeLike
Note that when I ran `crew install nano` it came back: “You don’t have a working C compiler.” – just run `crew install buildessential` so you can then install nano.
LikeLike
On some Chromebooks, wget isn’t installed by default meaning you can’t use it to install Chromebrew. To get around this, you can use curl: curl -Ls git.io/vddgY | bash worked for me.
LikeLike